Build your own blog site by using GithubPages + Hexo + Travis CI
Overview
Thanks for the github static site service - GithubPages - it's really easy to build your own blog for free.
At the rest of this article, you could see how to build a personal blog site step by step, using GithubPages + Hexo + Travis CI.
GithubPages
GithubPages is a free static site hosting service for personal/organization/project. Due to limited spaces, in this article we will only talk about personal pages.
Each account of github can host only one site on GithubPages, and the address is {username}.github.io.
Let's get started: 1. Create a repository named
{username}.github.io, please make sure the repo name is
exactly match this pattern, or it may not work (mine is
lenshood.github.io). 
Clone the repo to local.
1
git clone https://github.com/<username>/<username>.github.io
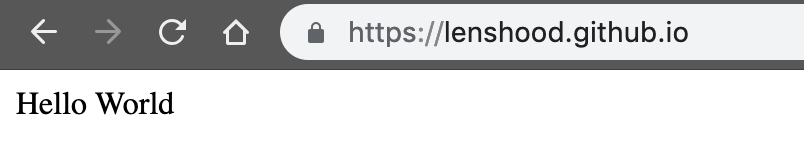
Create a simple index.html to display "Hello World".
1
echo "Hello World" > index.html
Push it to repo just like ordinary project.
1
2
3
git add .
git commit -m 'Demo Site'
git push -u origin masterAccess to {username}.github.io to see what happend.
For more details please see: https://pages.github.com/
Hexo
OK, so now we already know what GithubPages is and what it can do, however, you may see after we push the "Hello World" to index.html, there's jsut a plain text "Hello World" on the GithubPages website, that's far from even a basic personal blog!
All you need is Hexo.
The official website of Hexo said that Hexo is a fast, simple & powerful blog framework powered by Node.js.
At the very first, to use Hexo, we need two requirements: - Git - Node.js
- Install Git
- Git is the most popular version control system in the world.
- download it at: https://git-scm.com/downloads, to see what Git is and how to use it, see: https://git-scm.com/doc
- Install Node.js
- the basic concept of Node.js is beyond the scope of this article, you can find everything about Node.js at https://nodejs.org/en/.
- generally different program may depend on different Node.js version,
so the best way to install Node.js is with Node Version Manager - nvm,
install nvm is quite simple:
- cURL:
curl -o-https://raw.githubusercontent.com/creationix/nvm/v0.34.0/install.sh | bash - wget:
wget -qO-https://raw.githubusercontent.com/creationix/nvm/v0.34.0/install.sh | bash
- cURL:
- once nvm installed, run
nvm install stableto install the recent stable Node.js.
Finally we can install Hexo: npm install -g hexo-cli
Build your own Hexo blog
Generate the source file to the target
<folder>1
2
3hexo init <folder>
cd <folder>
npm installOnce generated, the fille structure is like:
1
2
3
4
5
6
7
8.
├── _config.yml
├── package.json
├── scaffolds
├── source
| ├── _drafts
| └── _posts
└── themesAll customer site setting of the blog that we just generated is related to
_config.yml, below is some basic settings, more information please see: https://hexo.io/docs/configuration
| Setting | Description |
|---|---|
| title | The title of your website |
| subtitle | The subtitle of your website |
| description | The description of your website |
| author | Your name |
| language | The language of your website. Use a 2-lettter ISO-639-1 code. Default is en. |
| timezone | The timezone of your website. Hexo uses the setting on your computer by default. You can find the list of available timezones here. Some examples are America/New_York, Japan, and UTC. |
Below is part of my
_config.ymlthe other part of1
2
3
4
5
6
7
8
9...
title: Lenshood
subtitle: Software Developer @ThoughtWorks. I have two cats.
description:
keywords:
author: Zhang Xuhai
language: zh
timezone: Asia/Shanghai
..._config.ymlis stay default.After do some basic configuration, we're looking forward to see our blog. First, run
hexo generateto build and generate static html files. Generally we need to do some configuration about our github repo, then runhexo deployto let Hexo deploy the static file to GithubPages. However, is there some way to allow us see what happend immediately?It is. Hexo provide it's own web server.
- to install, run
$ npm install hexo-server --save - after
hexo generate, simply runhexo server, then access http://localhost:4000 to see what happend.
Mine is shown following:

- to install, run
Theme The original theme of Hexo is a little bit boring, but there's many free third party theme we can use. See: https://hexo.io/themes/index.html I use the NexT theme, which is most stars of Hexo theme at whole github. (https://theme-next.iissnan.com/)

Deploy to GithubPages
- Install
hexo-deployer-git$ npm install hexo-deployer-git --save - Edit
_config.yml1
2
3
4deploy:
type: git
repo: <repository url>
branch: master # GitPages require personal website branch to be master - Run
hexo deploy
- Install
For more details about Hexo, see: https://hexo.io
Travis CI
We already know how to generate and publish Hexo blog to GithubPages. Web site is ready to present, articles are OK to read, everything's fine. What's wrong with that? Is there any troubles?
Imagine this scenario: we have one article that ready to published,
and one still writing, we want to publish and deploy right now, so after
run hexo g(shorthand of hexo generate) and
hexo d(shorthand of hexo deploy), every
subscriber of our blog will see the finished article and the unfinished
one. It's not elegant.
We can simply move the unfinished article out of source to ignored to generate and publish, but Travis CI can help us do that more elegantly.
Travis CI is a online CI pipeline that have the ability of build,
test, package and deploy automatically for your project. Travis CI can
watch the designated github repo branch, if there's anything changed,
Travis CI will be triggered to pull the source, then run the commands
you defined at the .travis.yml in the project.
Config Travis CI to auto generate and deploy our blog
Sign up tp Travis CI
- visit https://travis-ci.org/
- click the Sign in with Github button on the
top-right corner to sign up using Github account.

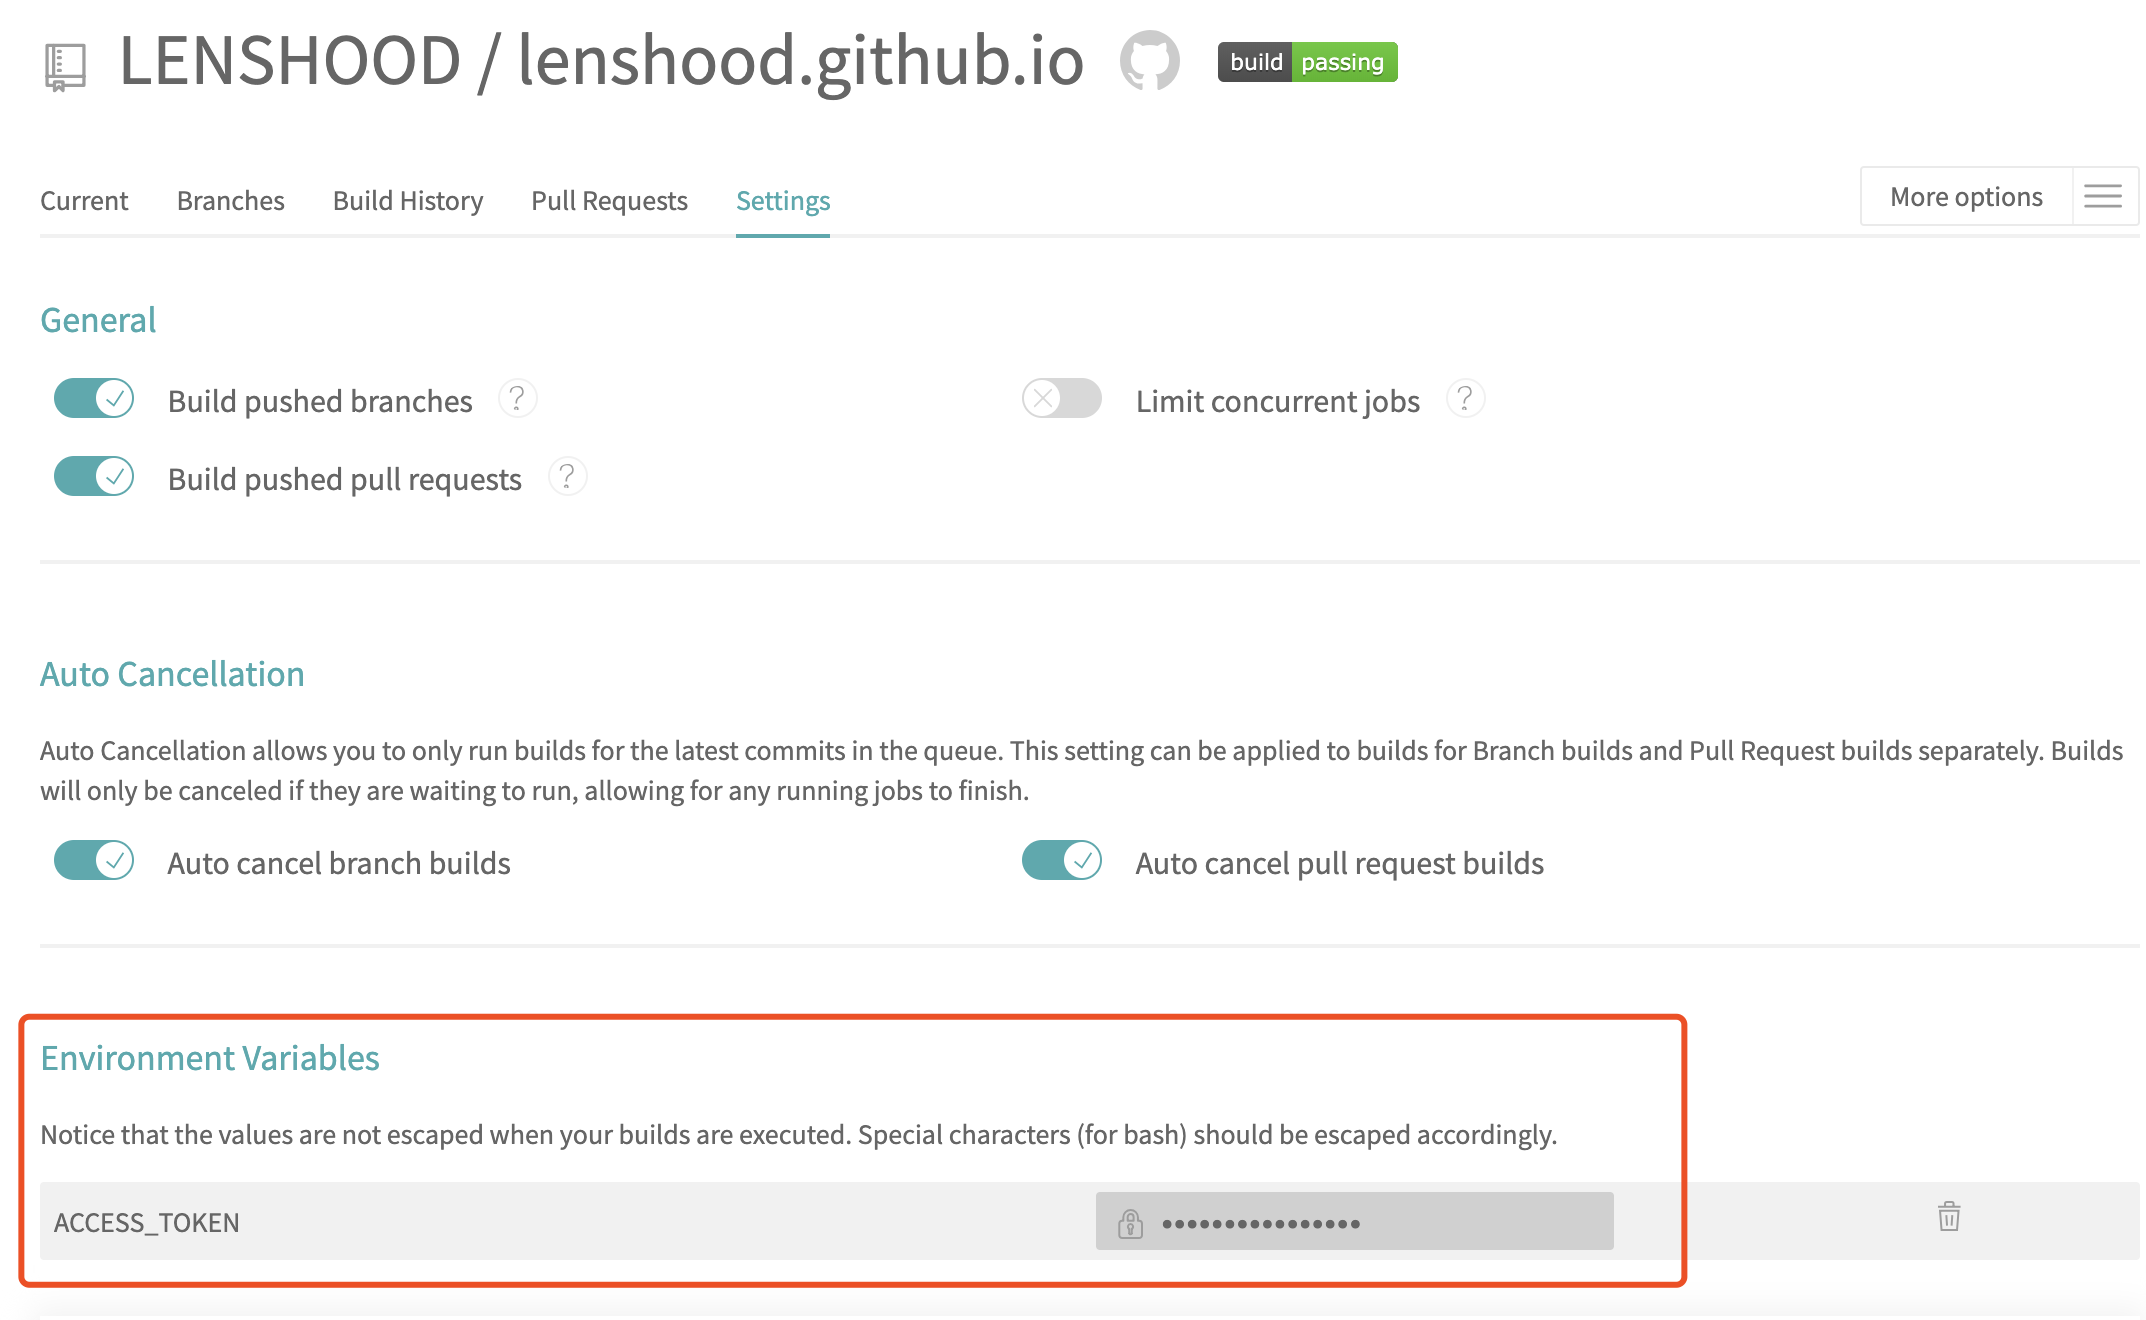
At the user => settings page, click the Sync account button, find your GithubPages repo, turn it on.

Generate github access token to let Travis CI have authorized to access your github repo.
- sign in github(https://github.com), go to Settings => Developer settings => Personal access tokens => Generate new token
- generate it with name ACCESS_TOKEN, and ckeck like following:

- sign in Travis CI, choose the right repo, go to settings, then fill
that token to the Environment Variables
Go back to our blog project, touch a new file named
.travis.yml, then typing the commands like following:As you can see, replace the1
2
3
4
5
6
7
8
9
10
11
12
13
14
15
16
17
18
19
20
21
22
23
24language: node_js
node_js: stable
branches:
only:
- source
before_install:
- npm install -g hexo-cli
install:
- npm install
- npm install hexo-deployer-git --save
script:
- hexo clean
- hexo generate
after_script:
- git config user.name "LENSHOOD"
- git config user.email "zhangxh_job@sina.com"
- sed -i "s/access_token/${ACCESS_TOKEN}/g" ./_config.yml
- hexo deploy<source branch>,<username>,<email>and<repo name>to your own info, the$(ACCESS_TOKEN)refer to the github ACCESS_TOKEN.Modify the
_config.ymlto change the deploy repo address:1
2
3
4deploy:
type: git
repo: https://access_token@github.com/<username>/<repo>.git
branch: masterFinally, push everything of the Hexo blog source to the source branch, then Travis CI will detect it, and deploy the static html files to the master branch.
For more details about Travis CI, see: https://travis-ci.org
Summary
At the end, we successfully build our own blog using three different things: GithubPages, Hexo, Travis CI.
Try it yourself now!